// setup guide
From your code to the stores, step by step.
Plan about 30 minutes for your first app. After that, every release is one click.
What you need first
- A Capacitor app in a GitHub repository
- An Apple Developer account, for iOS
- A Google Play Console account, for Android
- A mobile number that can receive a text
You don't need a Mac. iOS builds run on Macs hosted by GitHub, and GitHub bills any build minutes under your own plan.
Create your account
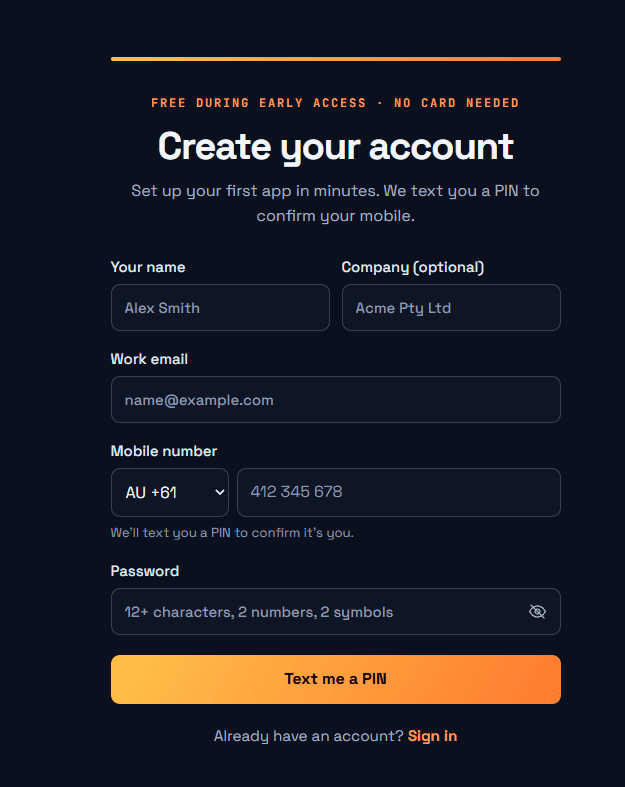
Go to the sign-up page and fill in your details. Your password needs at least 12 characters, with 2 numbers and 2 symbols. Press Text me a PIN, then enter the 6-digit code we text you.
Connect GitHub
In your portal, click Connect GitHub. Then click the link to GitHub's new token page.
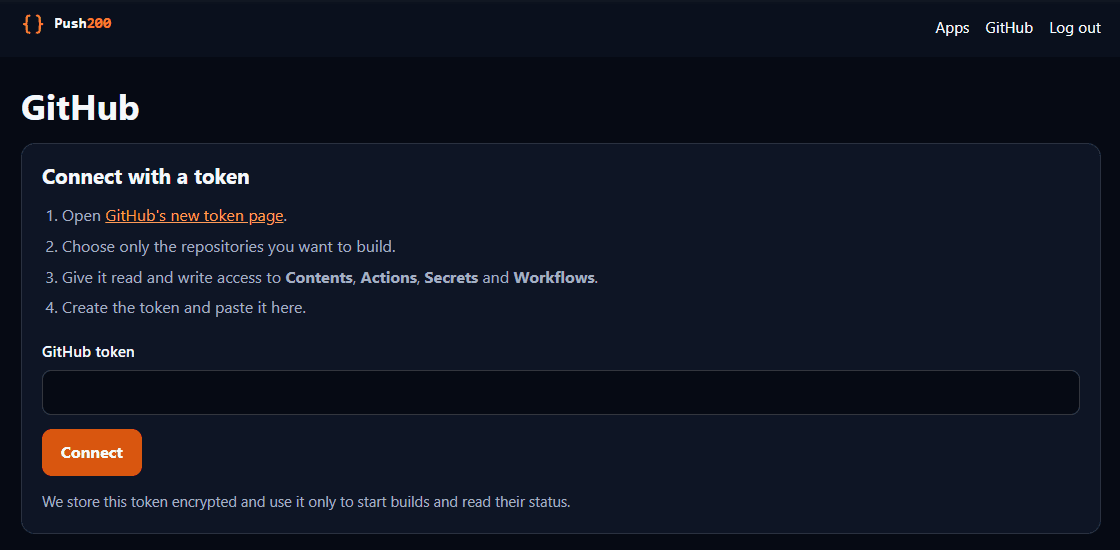
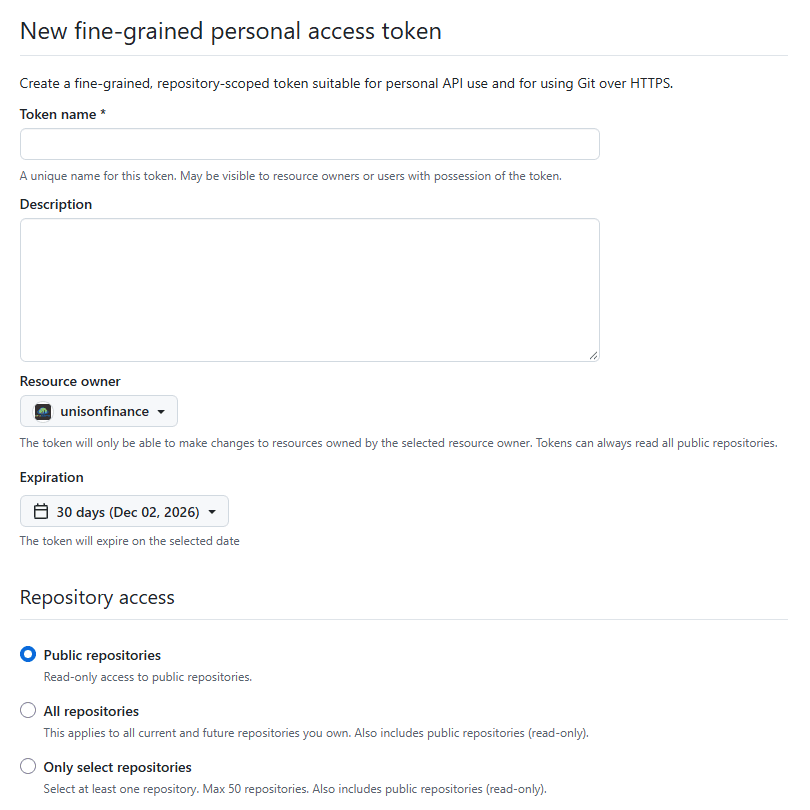
On GitHub, fill in the form:
- Token name: Push200
- Resource owner: the account or organisation that owns your app's repository
- Expiration: 90 days. Builds stop when it expires, so set a reminder to replace it
- Repository access: Only select repositories, then pick your app
Under Permissions, click Add permissions and set these to Read and write:
Click Generate token and copy it straight away, because GitHub only shows it once. Paste it into the GitHub token box in your portal and press Connect.
Add your app
Click Add an app and fill in:
- GitHub repository: written as
owner/name - App folder: where
package.jsonlives, such asmobile. Use.if it's at the top - iOS bundle ID and Android package name: such as
com.company.app
- GitHub repository: written as
Add your Apple keys
In App Store Connect, go to Users and Access → Integrations → Team Keys and create a key with the App Manager role. Download the
.p8file, because Apple only lets you download it once.In your app's page in the portal, open Apple keys and add:
- The Issuer ID and Key ID from that Apple page
- The .p8 file
- A distribution certificate private key. If you don't have one, create it with the command below and keep the file safe
openssl genrsa -out certificate_key.pem 2048Add your Android upload key
Open Android upload key and add your keystore file, its password, the key alias and the key password. If you don't have a keystore, create one with the command below. Keep the file and passwords safe, because you'll need the same key for every update.
keytool -genkeypair -v -keystore upload.jks -keyalg RSA -keysize 2048 -validity 10000 -alias uploadConnect Google Play (optional)
Without this, Android builds stop at a file you can download from GitHub. To send them to Play automatically, create a Google service account with access to your app in Play Console, then upload its JSON file under Google Play access.
Google requires your very first upload to be done by hand in Play Console.
Press build
Choose Build iOS and Android, iOS only or Android only. Your portal shows each stage as it runs. Your main branch is never changed, because each build runs on its own separate branch.
iOS builds stop in App Store Connect, ready for TestFlight. Android builds stop at a downloadable file or a Google Play draft.
Go live
Test your build, then submit it for review in App Store Connect and Play Console. Apple and Google review every app, and nothing goes public until you choose.
Stuck?
Email contact@push200.com and tell us which step you're on.
Start with step 1 →